
At the start of 2012, I lost my appetite for crafting embellishments after doing loads of flowers, butterflies, dragonflies, birds. And yet, I still can't get my motivation to make scrapbook pages again. I scouted my favorite youtube channels like jennings644 and rach0113 for inspirations. They're wonderful scrappers and their tutorials are really easy to follow and Ms Fiona (jennings644) is extra hilarious to boot!
Anyway, I came across this faux forged metal projects using aluminum foil sheets, acrylic paint and metal finish pastes and all sorts of thingies you may want to incorporate. Here's rach0113's foiling technique tutorial:
And here's Ms Fiona's take on the same technique:
I so enjoyed their vids that I raided our kitchen and looked at my stash of metal charms and small thingamajigs. And that my friends is how my foiling technique addiction started.
I would say that the crumpling is actually the hardest part because you have to take care to avoid tearing the foil so much. But it doesn't matter if there's tearing since they'd get covered with paint anyway.
At first I followed Ms Fiona's, I put lots of whatnots in the projects I made. And here are my initial take on their tutorials:
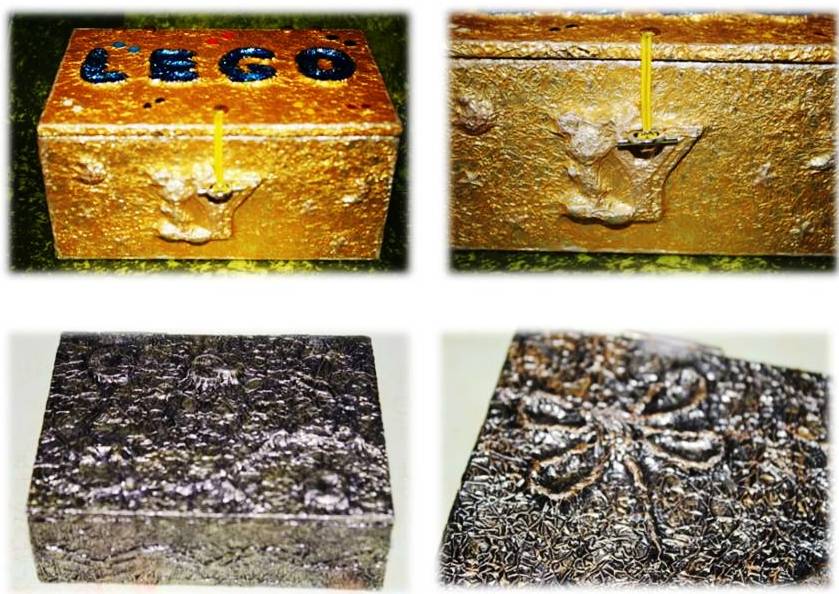 |
| The LEGO box is made-to-order by my son, he wanted blue LEGO letters on top and gold paint all over, no black. He's actually using it to store his Lego mini-figures :D |


I got tired of making boxes with hinged lids so my thoughts ran into making other objects and came up with these photo frames:
 | ||
| I used the scraps of foil & twisted it to make the letters & shapes |

After the frames I moved on to covering a whole canvas with crumpled foil and sprayed it with my DIY alcohol inks. The canvas is really blinding to the eyes but the effect of the alcohol inks is pretty psychedelic.

Every end of school year, I make souvenir crafts for my kids' teachers and classmates. What I craft depends on what I'm into at the time (I made small amigurumi key chains last year :D). This March I made these key chains among others:

After a time I got fed up with scrounging for bits and pieces to put in and the occasional tearing of the foil because of the embossed objects. So I thought I'd modify this technique and do away with the bits and just stick to crumpled foil.
It turned out lots easier and even better actually, if I may say so myself LOL! I'm like my favorite detective Hercule Poirot who is a stickler for symmetry. I'm not much into cluttered designs and layering. I want to see balance. Simple and clean but with prettiness, too.
So my foiling projects evolved into these:
 |
| Made these candle & pen holders from the cardboard tubes of the aluminum foils I've used! |

 |
| These bags are just cardboard pieces where I glued the foil. |
When I finally (!) got a Cuttlebug, my addiction took these forms:


 |
| These Tim Holtz Caged Birds will be the subject of another blog post :D |
 |
| as well as these multi-media art :D |
Doing some general house cleaning in the 2nd quarter of this year, I realized we have loads and loads of old and scratched CDs/DVDs. I racked my idea bin on what to do with them aside from the usual. I stacked 3-4 CDs, cut a strip of thick chipboard and glued it around the CD and made round boxes!

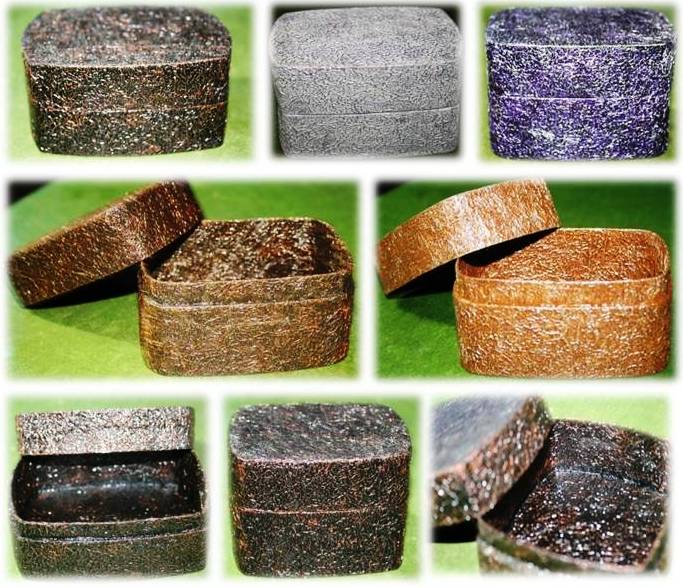
I put some of the foiled butterflies on the first tall boxes I made (all painted with black & metallic bronze and copper acrylic paints):

Ran out of old CDs so I put the scraps of chipboard from the Sizzix Stitched Frame I cut and made smaller boxes:
Feeling bolder, I crafted shaped boxes like these heart-shaped boxes in different sizes:

This is one of my faves--"You're a star and you're a box, so I shall call you, STARBOX." LOL!
 |
| Used a Ferrero chocolate container as template for these STARBOXes! :D |
When I ran out of chipboards, this KFC chicken meal box caught my eye:

It transformed into another of my foiled boxes! Adding varnish made the boxes sturdier not to mention shinier.

My daughter chided me one time that there seemed to be nothing in our house that I wouldn't cover with foil! I had to will myself to stop, I feel like the artist Cristo (hmmm, maybe I could suggest he cover a whole building with aluminum foil next time! LOL!).
It's one ingenious way of recycling. I even covered a big cracked (really hideous!) old Tupperware container with all the scraps of foil left from all my projects. I use it now to store all my foam stamps. :D


I had 3 of these de-worming tablet containers from a Rotary Club project my husband spearheaded 4 years ago. These containers weren't used because of the expiration date and there were cracks on the lids. The tablets were disposed of but I kept the packaging. They were added to the list of my aluminum foil victims!


These cellphone and chocolate boxes did not escape my foil mania, too!


It does feel good that from these tutorials I've done a lot of variations and created a lot of functional projects. I owe a lot to Ms Fiona and rach for the inspiration. My heartfelt gratitude, ladies!
Thanks for dropping by again! Happy crafting!
Hi Ces,
ReplyDeleteWhat an interesting topic you have here! Nice job with all the altered items. I think your projects are fantastic! Thanks for sharing!